Are you among the many people who would love to replace their boat carpets through the DIY way? It’s an easier way than you could ever imagine, but how can you do it?
Keep reading to find out. We’ll talk about how to replace a boat carpet (step by step).
Once you learn how to do it, it will make your boat look good and for long time. Also, you’ll save more money.
You see it as something tricky. It can be a bit complex, but this guide will help you.
When you master the art, you’d love to do it every day. Follow these steps as we start with the tools you’ll need.
Tools to Use for Replace Boat Carpet
Before you start the process, you should have all the correct tools. So, here are the items that will make your work easy.
- A Tape Measure
- Rags
- Staple gun
- Screwdriver
- Utility knives
- A pair of scissors
- Scraper and acetone
- A dry mopper
- A stiff broom and a roller
- A screwdriver
- An adhesive of the marine type
- Clamps and weights
- Gloves
How to Replace Boat Carpet?
You now have all the tools for the work. It’s now time to get your boat’s floor a new and beautiful look. When you follow each step well, be ready to smile in the end.
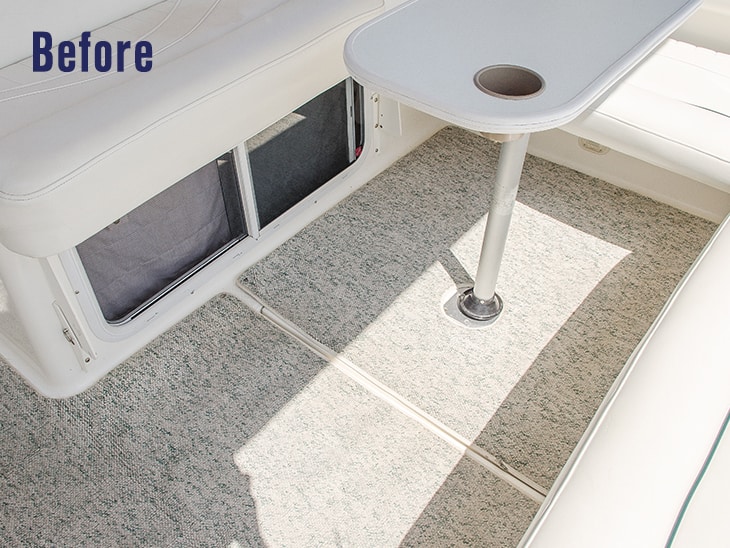
Step 1. Get the Surface Ready
You’ll first need to remove the old carpet. So, when handling the old boat surface, you should check its state.
During the assessment, place the boat on a trailer. It makes the craft to be more stable. After that, start by removing the boat battery as you prepare to remove other stuff.
Ensure you remove any deck pieces from your boat. It will make things to be easier for you. This part will take more time when the items are hard to come off.
Some items are the hardware, railing, and seats. Here’s where the screwdriver will help. As you remove them, you should know their exact spots.
It’s because you’ll have to return them to their positions. After that, you can now remove the carpet.
Well, here is a tip as you remove the old carpet. Take any pics of the items you are pulling from the deck using a camera or phone. These photos help record their positions well.
Step 2. Remove the Carpet
It’s now time for the heavy part. Removing the old carpet is the most tiresome process, so get ready.
When removing your carpet, you’ll need your utility knife. The need for a screwdriver will depend on how you placed the old rug.
Ensure you first check if any bolts or staples kept the old rag in place. You’ll use a carpet knife if it’s the staples. As for the bolts, use the screwdriver to remove them.
After removing these items, it’s now time to cut the old carpet. Be careful to see if there was an adhesive on the old rug.
Sometimes, you can use a vibrating saw. But the best and cheapest way is to cut using a knife.
You can start at the corners as you cross your fingers. Do it as you check if the rag comes out easily. Remember, to work smoothly and handle the carpet well.
If the old rag has much glue, it can be hard to remove. So, it’s when you’ll need to use the acetone and scraper.
These two items will help you remove the layer of glue that’s holding the carpet. Use your clean rug to rub the acetone on the carpet’s edges.
After rubbing the acetone well, remove every adhesive you can see. Then, use the scraper to lift the carpet from the surface.
Repeat the process for each piece of carpet until when you finish all the areas. Ensure you check your deck to see if there’s any damage. If there is any problem, correct it before you continue.
When removing the carpet, here is a pro tip. Never miss using the acetone; it gives your new adhesive a solid grip to hold the new rug.
Step 3. Prepare Space for the New Carpet
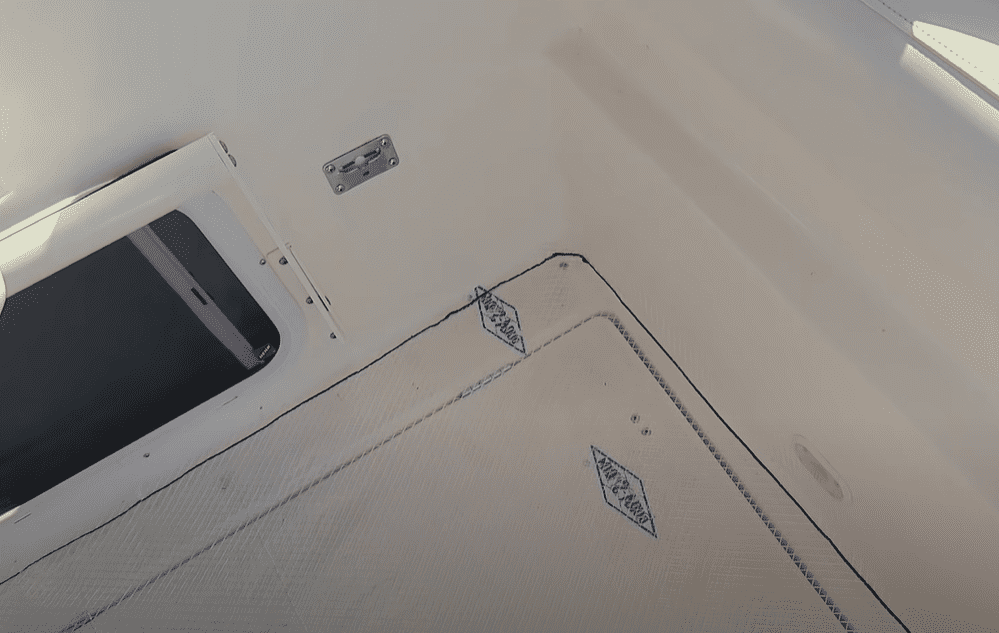
You’ve now removed the old carpet. Now it’s time you got into the real meat, installing the new rag.
Before that, ensure there’s space for the correct carpet and adhesive. So, take a rag and clean up the deck after immediately removing the old glue and carpet.
Use your dry mop to clean the deck. After that, wipe the remaining hatches using a wet and clean rag.
Then, clean the deck’s surface using clean, warm water with soap. Scrub using a soft brush.
When you finish cleaning, allow the floor to dry overnight. Remember, the new glue won’t attach to the carpet if the carpet hasn’t thoroughly dried.
As a tip, pick on the glue that suits that given marine carpet. But when you choose the wrong one, like latex glue, the outcome won’t be pleasant.
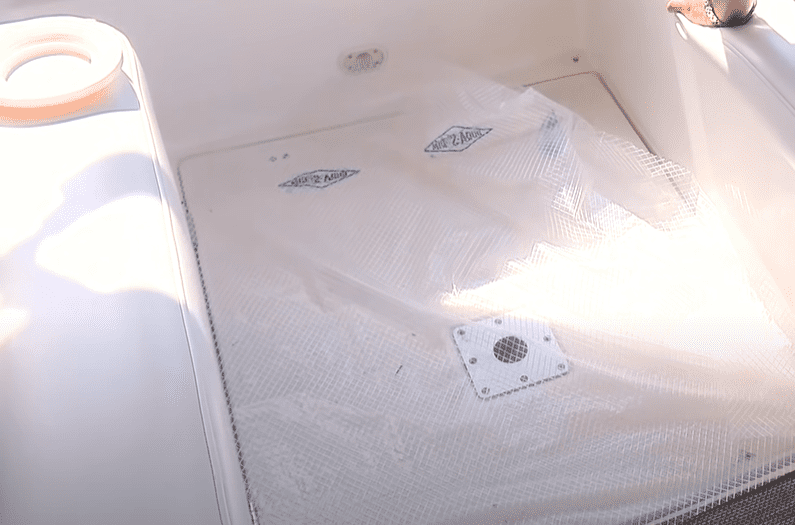
Step 4. Lay down the New Carpet
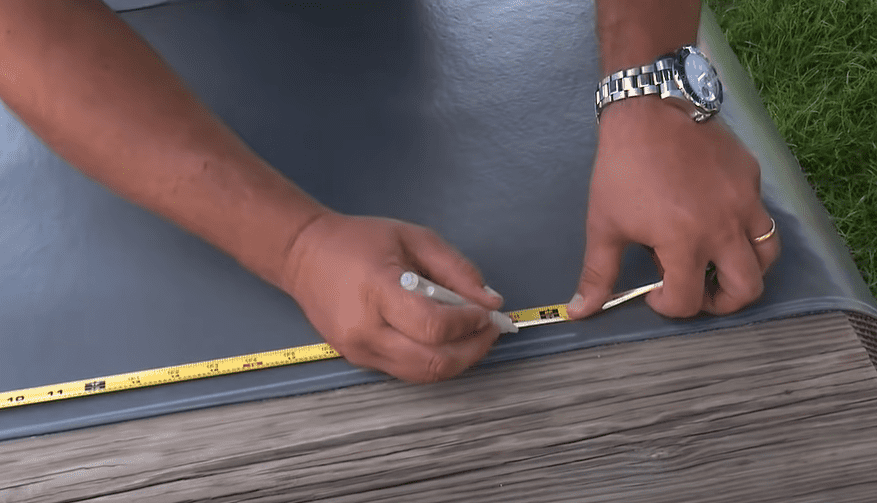
Take the new carpet and place it on the boat’s surface. Ensure you put it together with the backing up. Also, remove any lumps or dirt.
Here, you’ll use a tape measure to see that the new rag is of the correct size. Measure and draw various arrows on the backing. Ensure you also weigh down the corners.
When cutting the exact measurements, it’s not wrong to go an extra inch. If it turns out to be excess, use the knife or scissors to cut the pieces.
Remember to replace the blade every time. It prevents any pull outs from the carpet. Everyone loves to have nice and beautiful cuts.
Now apply the marine-grade adhesive on the surface. It’s better to do it on the surface rather than on the carpet.
As you spread the glue, please give it a beautiful even coat. Give the adhesive some time for it to cure.
After that, softly roll the carpet in the key areas or the boat’s center using a heavy object or metal. This metal will prevent the rug from shifting.
Once the carpet attaches to the center, glue the other small parts. Keep working in sections from the center as you move to the edges. Use carpet clamps to place the carpet on the edges.
Let the glue settle for over an hour. Then, roll over the carpet using a roller.
If you find any bubbles or wrinkles, lift the carpet before it binds with the glue. Ensure it’s flat for good results.
The pro tip when placing the carpet is never to remove the gloves. It will help you protect your hand from the chemicals.
Step 5. Keep the Carpet Secure
Sticking the carpet with glue doesn’t mean that it will be safe. You’ll need to overlap that rag up to the deck.
Use the bolts or heavy-duty staples. Here, you’ll need a screwdriver or a staple gun to finish up the work.
Remember, this extra cover on the edges will make the carpet beautiful and safe for many years. These edges won’t fray or come out.
More Tips
So, you now have your new boat carpet in place. But there are other tips you should consider to see that you have a great rug for your boat.
Also, these tips will help keep you safe. Read on to find out more about what else you should do.
- After you secure the carpet, the work is not yet complete. You should restore the beauty of the boat.
- Pick the deck pieces and put them in their original place. Do you remember those pics you took when you were clearing the surface? It’s time for them to help you.
- Once you are sure everything looks good, you will have finished your project. Use other screws to make the deck stronger. Your boat will now be ready for the next trip.
- After removing the old carpet, ensure you dump it well. Consider your state laws of how you should dump such waste.
- When replacing an old carpet with a new one, ensure you pick on a good quality carpet. Remember, you aren’t going to buy something of a lesser quality than the old one.
- Choose a denser carpet because it will last longer. Besides, a heavy carpet always looks beautiful. Thick carpets also make it hard for the hatches to open.
- As you plan to buy a new carpet, go for one that’s double your craft’s size. This move will ensure your project goes on well.
- If you choose an excellent quality carpet, it will take a long time before you replace it. So, consider getting something nice.
- Also, learn the correct way to clean the boat’s carpet. It will make your carpet fresh and beautiful for a long time.
- The next time you’ll need to replace a rag, you may lack the tools. So, think of looking for a tool kit.
- Sometimes, the kits can become costly, go to the retailers who sell carpet placement kits. You’ll get them without any problem, even with a small budget.
Conclusion
The process of replacing a boat can be sweet when you master all the steps. You’ll always enjoy it as your DIY project.
There are tools that you’ll use for each step. Ensure you wear your gloves from the first step.
So, is there any step that seems hard to understand? Don’t fear to reach out to us. We’ll be ready to help you.
Remember, next time you want to replace your boat carpet, follow these ideas:
- Prepare the surface
- Remove the old carpet
- Clean the space for the new carpet
- Lay it down
- Keep the rug safe.